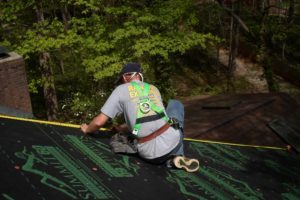
Repairing the roof is more than removing and replacing shingles. If something isn’t done correctly, or if the steps aren’t followed in the right order, you could end up with a leaky roof and a damaged interior.Below we explain the roofing repair process, giving you a better idea of what goes into our work and why hiring a professional Raleigh roofing contractor can yield better results than trying to do-it-yourself.
Best Roofing Materials We Use:
- Ridge Vent
- Roofing Nails
- Starter Strip
Roofing Videos, Raleigh NC
*RainGo Specific Materials*
Titanium Backing:
A synthetic type of backing that is engineered to lay flat, won’t expand or contract, and prevents mold growth.
Copper Infused Shingle:
These shingles are algae and moss resistant.
Tools of the Roofing Trade:
- Pneumatic Roofing Nail Guns
- Air Compressor
- Utility Knives
- Tin Snips
- Tape Measure
- Hammer
- Caulk Gun
The Repair Process
Prep the area:
Before beginning any Raleigh roofing repair, it is important to prep any areas that could be affected by the work. This means parking cars on the street to prevent debris from falling and hitting them, removing artwork from the walls in case the banging causes them to fall, covering pools and hot tubs, and protecting plants, flowers, and shrubbery.
Also, make sure to keep children and pets away while the roof is under repair.
Remove old shingles / Inspect the roof:
Once the area is prepped, it’s time to prep the roof by removing old shingles. Once all the shingles are removed, it will be easy to see any damaged areas, like rotten wood or damaged boards, that will need to be addressed before replacing the shingles.
Clean the roof:
After all the old shingles are removed and the roof has been inspected, it’s time to clean the roof. This can be done by sweeping, removing old nails, and reattaching loose boards in the sheathing.
Apply titanium backing:
Next, apply the titanium backing to the clean roof. This can be done by rolling it out and stapling the backing to the roof every six to eight inches.
Using pre-cut shingles:
Take your pre-cut shingles and measure them across the length of your roof. This will let you know if you’ll need to have partial shingles on the ends or not.
*Note, the bottom row of shingles must hang past the roof.
When you’re ready, it’s time to install the starter shingles. Starter shingles are the bottom row – and it’s important they are applied correctly so water doesn’t get through. Nail the starter shingles down, and then apply asphalt cement with your caulk gun to the roof and press down on your shingles. It’s also important to note that shingles should not overlap – they should be staggered.
After you’ve applied your starter shingles, you can begin working your way down and up the roof.
Begin to lay courses:
Once your starter shingle row is complete, you can start laying the rest of your roof. To do this, you’ll place your shingle, add your nail about six inches from the lower edge, and then hammer in a nail about two inches from each end of the shingle. The very next shingle should cover the nail vertically.
Repeat this process across the roof, staggering your shingles to create your pattern.
Call the Professional Raleigh Roofing Contractors for Your Project
To learn more about RainGo, our roofing repair process, or to schedule a consultation, call (919) 875-0700 or fill out this contact form.
Watch a Video of the Rain-Go Exterior Team on a Roofing Project
Do you want to see how we repair a roof? RainGo’s Tim Howell videos the RainGo Exterior crew laying aluminum pans, water/fire protectant, titanium backing, and applying new shingles:
